
A Step-by-Step Guide to Flawless Hardwood Floor Installation
The allure of hardwood floors lies not only in their natural beauty and durability but also in the sense of timeless elegance they bring to any space. Whether you’re renovating your home or embarking on a new construction project, hardwood floor installation is a transformative process that requires careful planning, attention to detail, and a touch of craftsmanship. In this comprehensive guide, we’ll walk you through the step-by-step process of achieving flawless hardwood floor installation, from choosing the right type of wood to ensuring a seamless finish that will stand the test of time.
- The Appeal of Hardwood Floors: A Timeless Elegance
Hardwood floors have maintained their popularity through the ages, and for good reason. They offer:
- Natural Beauty: Each hardwood plank boasts unique grain patterns and colors, creating a visual masterpiece that enhances any interior.
- Durability: Well-maintained hardwood floors can last for generations, making them a wise investment.
- Versatility: Hardwood complements a range of styles, from traditional to contemporary, making it suitable for various design aesthetics.
- Selecting the Perfect Hardwood: An Art of Choice
Choosing the right hardwood for your space involves a combination of aesthetic preferences and practical considerations:
- Wood Species: Oak, maple, cherry, walnut, and hickory are among the popular hardwood species. Each offers distinct grain patterns and hues.
- Grades: Wood is graded based on appearance. Clear grades exhibit a uniform look, while rustic grades feature more knots and character marks.
- Hardness: Different wood species have varying hardness levels. Consider foot traffic and the likelihood of wear and tear.
- Width and Thickness: Select plank width and thickness based on the dimensions of your space and the design aesthetic you wish to achieve.
- Preparation: Laying the Foundation for Success
Proper preparation ensures a smooth and successful hardwood floor installation:
- Subfloor Inspection: Ensure the subfloor is level, clean, and dry to prevent issues with the final installation.
- Moisture Testing: Test the moisture levels of both the subfloor and the hardwood to prevent future problems like warping or buckling.
- Acclimation: Allow the hardwood planks to acclimate to the indoor humidity and temperature for a period recommended by the manufacturer.
- Choosing Installation Method: Decide between nail-down, glue-down, or floating installation based on the type of hardwood and the subfloor material.
- Installation Process: From Start to Finish
a. Gathering Tools and Materials: Gather the necessary tools, including a saw, nails or adhesive, spacers, and a hammer.
b. Prepare the First Row: Start by removing the baseboards and creating an expansion gap around the perimeter of the room.
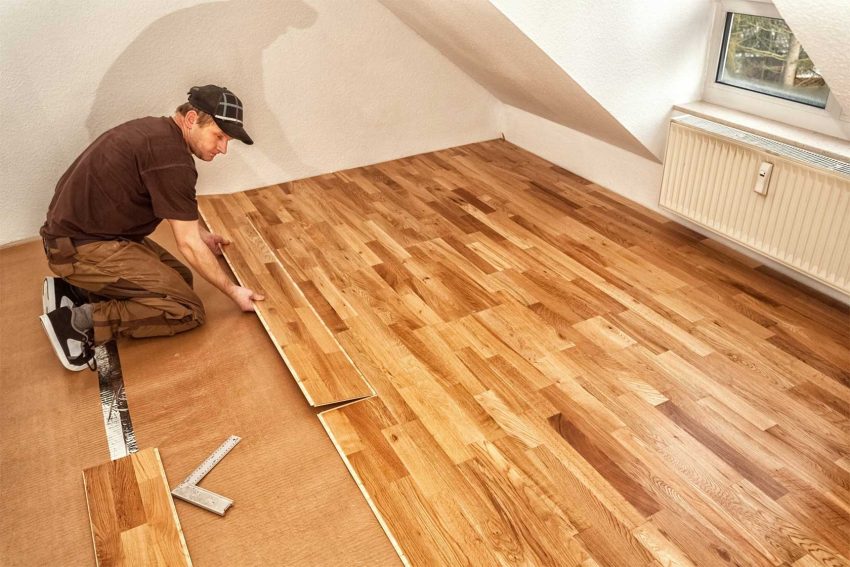
c. Lay the First Row: Lay the first row of planks along the longest wall, with the groove side facing the wall. Use spacers to maintain an expansion gap.
d. Continue the Installation: As you proceed, stagger the end joints of adjacent rows to create a visually appealing pattern and enhance structural integrity.
e. Nail or Adhesive: Depending on the chosen installation method, either nail down the planks to the subfloor or apply adhesive to the groove side of the planks.
f. Tapping and Fitting: Use a tapping block and a hammer to fit the planks snugly together. Avoid over-tapping to prevent damaging the wood.
g. Finishing Rows: Repeat the process of laying, fitting, and securing planks until you reach the final row.
- Completing the Installation: The Last Steps
a. Trimming and Baseboards: Measure and cut the last row of planks to fit the remaining space. Reinstall the baseboards to cover the expansion gap.
b. Fill Nail Holes: If you’ve chosen a nail-down installation, fill the nail holes with wood filler that matches the color of the hardwood.
c. Sand and Finish: Sand the hardwood floor to create a smooth surface, and then apply the chosen finish, whether it’s oil-based, water-based, or a natural oil.
d. Final Inspections: Inspect the floor for any imperfections, ensuring that all planks are secure and that the finish is evenly applied.
- Maintenance and Longevity: Caring for Your Hardwood Floors
To preserve the beauty and longevity of your newly installed hardwood floors:
- Regular Cleaning: Sweep or vacuum regularly to prevent dust and debris from scratching the surface.
- Area Rugs and Mats: Place rugs and mats in high-traffic areas to minimize wear on the hardwood.
- Avoid Moisture: Wipe up spills immediately to prevent water damage, and maintain indoor humidity levels to prevent gaps or warping.
- Embrace the Art of Hardwood Floor Installation
Installing hardwood floors is more than just a technical process—it’s an art that requires precision, dedication, and an eye for detail. By choosing the right hardwood, preparing your space meticulously, and executing each step with care, you’ll transform your space into a haven of timeless beauty. As you stand back and admire your perfectly installed hardwood floors, you’ll realize that you’ve not only added value to your home but also woven a masterpiece of natural elegance that will be cherished for years to come.


Leave a Reply